
Zoom Information for Students
¿Cómo usan los estudiantes Zoom?
Zoom can be used to do many things outside of a regular classroom.
- Meet with group members for projects and assignments
- Work on homework with classmates
- Record a presentation
- Schedule online tutoring
- Host a meeting for a club or organization
Days Before
- Remember to download and install the Zoom launcher (PC/Mac) or the app (iOS/Android) in advance, as it can take several minutes to complete.
- Review Zoom instructions here. More information can also be found at Zoom's Getting Started page.
- Join a Zoom Test Meeting (found by clicking here) to confirm your computer or device's capabilities.
- In your test meeting, practice using the Zoom features listed below under "Views to Choose From" and "The Zoom Menu."
- Contact SBCC’s IT Support Desk to resolve any technical issues if your test meeting fails.
- If you have a disability and need an accommodation such as captioning, contact SBCC's Disability Services and Programs for Students.
- Be sure to connect with them several days prior to your meeting to schedule the appropriate accommodation or service. These things take time.
- Please review the accessibility features on the Zoom Accessibility Web Page.
- If you need assistance, please contact dsps@sbcc.edu.
15 Minutes Before
- Find a quiet space with strong WiFi that is free of distractions. You can test your internet connection speed by visiting Zoom's suggested third party bandwidth tester, Speedtest.
- Open Zoom via the downloaded program, app, or through the Zoom link provided to you.
- Test your headphones, microphone, and camera to make sure the class can hear and see you (and vice versa).
- To test your microphone, click "Test Computer Mic & Speakers" in the pop-up window that appears when first opening a test meeting or beginning your scheduled meeting. More information on audio testing can be found here.
- To test your camera, just look at the Zoom window to see that you are clearly visible, non-pixellated, and can move and speak without noticeable delays. Click here for more video testing tips.
- You may need to give Zoom permission to access your camera and microphone beforehand. Typically, the request for permission will appear in a pop-up window the first time you open a Zoom Meeting, and will carry over to future meetings. If you declined permissions in the past, you will need to go into your PC or Mac's settings to allow Zoom to access your camera and microphone. You can contact the Help Desk to assist you in this process, or find information on the internet for your specific device.
- Close any windows or programs open on your device that are unrelated to your meeting. This focuses your device's power to provide the best Zoom meeting experience possible, and prevents potential embarrassing moments if you happen to share your screen. Do you really want your professor to know how many cat videos you actually watch?
During the Zoom Meeting
- Click Start Video to begin broadcasting from your webcam.
- Click the Chat bubble to ask questions via text, share links to websites, and keep up with the class's back-channel discussion. You can chat to everyone in the meeting, just the professor, or a specific person.
- Find out who else is in the meeting by clicking Participants. This is also where you can "raise your hand" to ask a question, answer a question, or start an intense philosophical debate. What you do with this power is up to you.
- Be prepared to share your screen with the class. They can see the tabs you have open.
- At the end of the class, click Leave Meeting.
Open the Zoom program, app, or website and click "Schedule Meeting." (More information on scheduling a Zoom Meeting)
Views can be changed by hovering the mouse at the top right of the Zoom Meeting window and clicking the desired view. There are three views in Zoom:
- Speaker View: Focuses on the speaker. If the cutie from down the hall is talking, use this view.
- Gallery View: Shows all participants (up to 25 people). Use it when you feel like watching everyone.
- Fullscreen: Maximizes screen.
When currently in Speaker View, switch to Gallery View by clicking this button: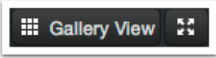
When currently in Gallery View, switch to Speaker View by clicking this button: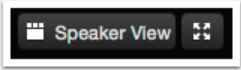
To make the Zoom Meeting take up your entire screen, regardless of the view mode you're
in, click:
The Zoom menu contains several features that can be used at any time throughout class
meetings. For laptops, PCs, and Macs the menu can be found by hovering over the bottom
of the Zoom window. In the Zoom app, the menu can be accessed by tapping the bottom
of the app window.![]()
- Mute: Silences and unsilences your microphone.
- Invite: Lets you bring more people into the , if your professor/meeting host provides those permissions.
- Share Screen: Allows you to share a variety of windows and applications. Participants can share views of their desktops and specific windows currently open on their computer, write on a digital whiteboard, and even share a screen directly from their iPhone or iPad. These features (and more) are outlined thoroughly here.
- Chat: Works like Facebook Messenger, but without the GIFs or stickers. You can send messages to everyone, just the professor/meeting host, or a specific person.
- Record: If the host allows it, you can record and download as much of the meeting as you want. More information on recording can be found here.
- Leave Meeting: Click this when you're ready to peace out and get some off-screen time.
- More (on the Zoom app): Allows you to raise your hand, and other features.
Using Zoom Dial in With Phone
- Join the meeting on your computer using the Zoom application.
- When prompted to join with computer audio or phone, select the “Join by phone” option.
- You will see a window listing the call in numbers, similar to this:
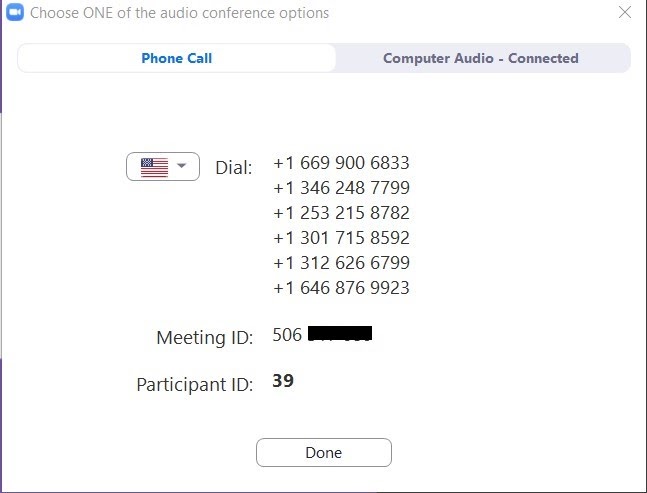
- On your phone, dial one of the provided numbers listed. (If you are in Santa Barbara, 1-669-900-6833 will be the best number to choose.)
- Follow the prompts on your phone using the Meeting ID and Participant ID provided for your meeting.
- Once connected, you can close out the window and use the controls in the Zoom application on your computer to mute/unmute your phone.
Video chatting in a professional setting is a new experience for many students. Here are some tips to help you look (and feel) like the most impressive Zoomer in the room.
- Getting clear video is a lot like taking a good selfie -- it's all about contrast. Light your face more brightly than the background to make it easier to see you.
- Hold your head high in the picture frame. It conveys confidence.
- Keep your clothing PG and professional.
- Be yourself. Move physically and make facial expressions.
- Microphones pick up all ambient noise, so keep your mic muted until it's your time to speak.
- Remember that when on-camera, other activities such as eating, drinking, shuffling papers, etc are extremely distracting (and sometimes unflattering).
- If you can't use video, upload a nice profile image of your face to your Zoom Account. Give your classmates something to look at while you speak.
- Have fun!
Don't panic! We have a number of resources out there to help you Zoom successfully.
- View Zoom Support Center's Getting Started Resources here.
- Contact the SBCC I.T. Support Desk
- Chat with Zoom Support online by going here and clicking "Chat live" underneath "Support Process."
- Call Zoom Support at +1.888.799.9666 ext 2