How to prevent your Zoom Meetings Being Zoom-Bombed (gate-crashed) by Trolls
How to Avoid the “Zoom Bomb”
"Zoom bombing" is essentially a form of trolling. It happens when someone with malicious intent joins a Zoom meeting (usually by trying random meeting IDs until they find one that works) and then they attempt to disrupt the video chat and upset participants by shouting offensive statements or putting disturbing or offensive images in their video feed. The following configuration changes and strategies will help prevent your Zoom sessions from being disrupted in this way.
General Guidelines
- Use a unique Zoom ID for each meeting. Avoid using your Personal Meeting ID.
- Do not post meeting links on social media.
- Do not share links to meetings you are invited to join without the host’s approval. The host can send more invites to the relevant individuals or parties.
- Make the recommended configuration changes listed below.
- Assign a password when scheduling a meeting, as per instructions below.
- Utilize waiting rooms to let participants in as you are ready to receive them.
Configuration Changes
These changes to the default settings are recommended for anyone who is hosting Zoom conferences open to the public or with children attending. Changing these settings will help you keep control of your meeting and focus on your content.
Open your Zoom account settings page and change the following:
- Join before host – OFF
- Mute participants upon entry – ON
- Private chat – OFF
- File transfer – OFF
- Allow host to put attendee on hold – ON
- Screen sharing – ON with “Host Only”
- Disable desktop/screen share for users – ON
- Annotation – OFF
- Remote control – OFF
- Allow removed participants to rejoin – OFF
- Waiting room – ON
- Use Personal Meeting ID (PMI) when scheduling a meeting - OFF
- Require a password when scheduling new meetings - ON
Join before host
The participants could be having a party without you there to monitor.
Recommendation: Turn it off

Mute participants upon entry
Barking dogs and crying babies can take over your meeting unintentionally. So can the participant who is singing their favorite heavy metal song at the top of their voice.
You might also consider disallowing participants to unmute themselves. In that case participants can use the “Raise hand” feature or the chat room to indicate when they want to speak. You can manually unmute them.
Recommendation: Turn on

Private chat
The chatroom is one of the key ways to get live feedback and participation with your participants. We want to see all the communication that is happening. Disabling private chat will help tamp down any possible bullying or harassment during your meeting. They can use discord or text messages if they need a backchannel.
Recommendation: Turn off

File transfer
The ability to send files to your participants is very handy for you. Not so helpful if the participants are sending inappropriate (even unintentionally) files/gifs/images to the group. Put your files on Google Drive and give them download links.
Recommendation: Turn off

Allow host to put attendee on hold
Sometimes participants have environmental consideration that require you to step in and pause them. The participant could have someone enter the room. They could have a TV running behind them. They might have forgotten to dress appropriately…
Recommendation: Turn on

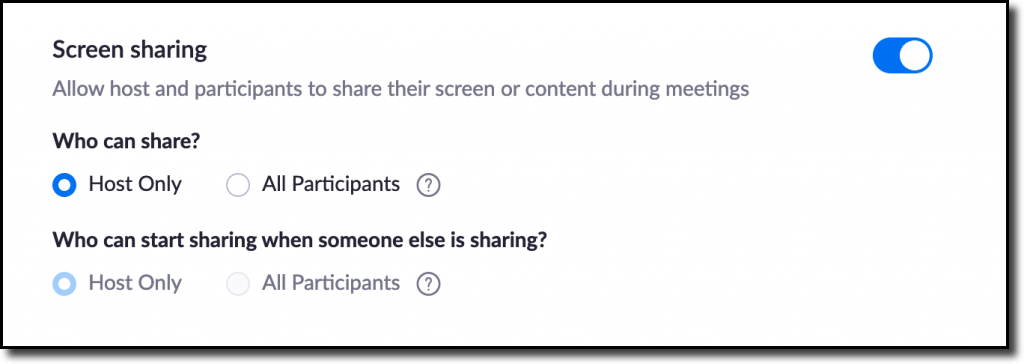
Screen sharing
Your department meeting is a great place for colleagues to share their business work with the group. Your classroom might not be. Participants can take over the session share and put anything they would like on screen for all in attendance. You can make a participant a co-host if you would like someone else to share their screen.
Recommendation: Turn on “Host Only”
Disable desktop/screen share for users
We don’t need to see the personal photos and information of your co-host when they share. This setting will enable them to share an Application (Powerpoint, Firefox, Chrome, Powershell, etc.) only. You should consider only sharing applications yourself.
Recommendation: Turn on

Annotation
Annotation gives you the ability to “draw” over the screen. It also gives that to your participants. They can draw anything that comes to mind over your presentation, your face, or anything else.
Recommendation: Turn off

Remote control
This is a handy support feature in a 1:1 session. You don’t want participants constantly requesting remote control of your desktop during meetings.
Recommendation: Turn off

Allow removed participants to rejoin
When you kick someone out of your meeting for any reason, they shouldn’t be able to come back.
Recommendation: Turn off

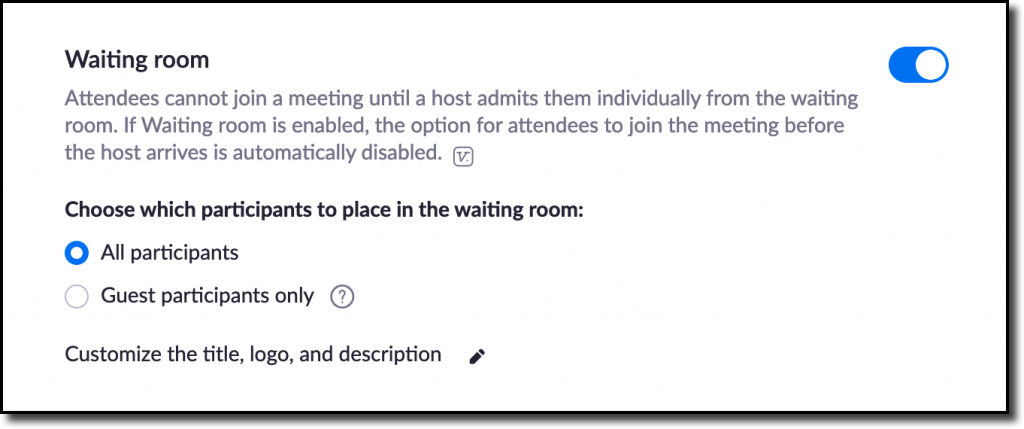
Waiting room
This is perhaps the most useful feature to help control your meeting or classroom. All participants will enter the waiting room before joining the main session. This allows you to let participants in as you are ready to receive them.
Recommendation: Turn on and customize
Optional – Consider locking your meeting once everyone is in attendance.
Personal meeting ID when scheduling sessions
Your personal meeting ID stays the same, so if you use this for class sessions, anyone with your Personal meeting ID can join you in any of your sessions. Ensure this is toggled OFF in your account settings.
Recommendation: Turn OFF

Require a password when scheduling new meetings
Recommendation: Turn ON
A password will be generated when scheduling a meeting and participants require the password to join the meeting.
The meeting password will be encrypted and included in the join meeting link to allow participants to join with just one click without having to enter the password.
Require a password when scheduling your meeting
When scheduling a Zoom meeting, create a Meeting Password. Anyone who attempts to join the session will be required to enter the password before they can come in. Remember to give the password to the attendees when you send them the meeting invitation link.

The meeting password will be encrypted and included in the join meeting link to allow participants to join with just one click without having to enter the password.
Other settings
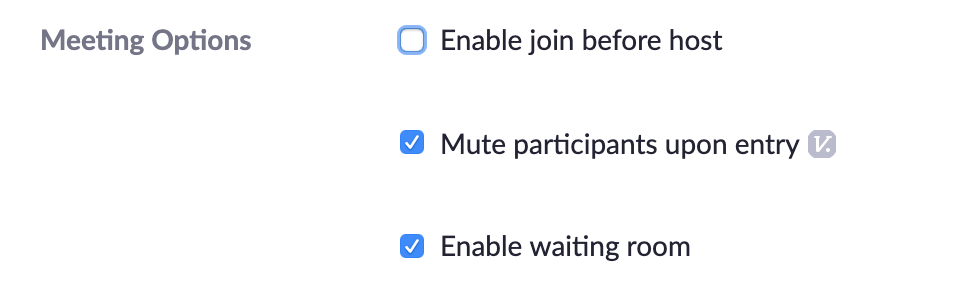
Consider adjusting these settings when scheduling your meeting:
- Video / Participant - OFF (Participants will join with their video turned off until they turn it on)
- Enable join before host - OFF (Nobody can join until you do)
- Mute participants upon entry - ON (Participants will join with their microphone muted until they unmute)
- Enable waiting room - ON (This allows you to let participants in as you are ready to receive them)
Invite specific people directly, not publicly
Do not share the meeting link on an unrestricted publicly available social media post. Provide the link directly to specific people you want attending, and ask them not to post the meeting link publicly.
Manage Participants Options
Do not allow participants to Unmute or Rename themselves. This menu is accessed by selecting "Manage Participants" in the Zoom app and then selecting "More" at the bottom of the Participants window.
Consider locking the meeting after a certain amount of time
This will prevent individuals joining after the meeting is locked. But keep in mind these considerations:
Pro: This prevents individuals from randomly joinging late if they discover your session ID after the session begins.
Con: Students cannot join the session late or rejoin if they have a technology problem.
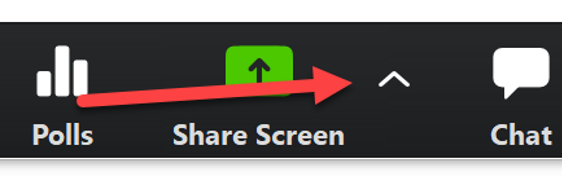
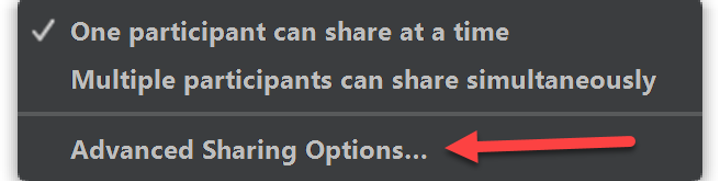
Consider turning off the Participant screen sharing
The host can turn Participant screen sharing off by default in the Settings on the Zoom website prior to scheduling and/or choose to allow Participant sharing during a live session.

If you need to quickly gain control of a Zoom session that has an active disturbance, you can take these actions:
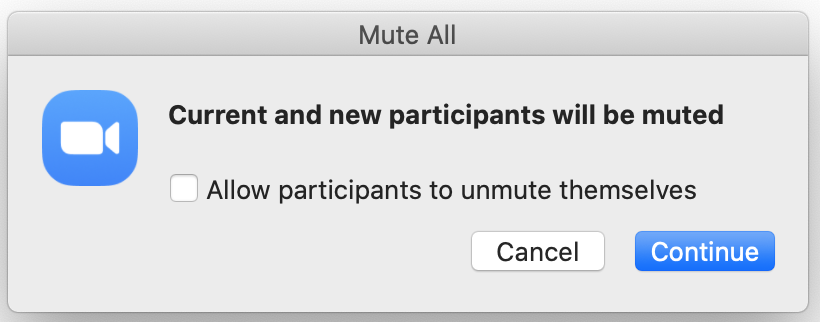
Mute everyone and don't let them unmute
Mute everyone in the session and prevent them from unmuting themselves. To do this, select "Manage Participants" in the Zom app, then select "More" at the bottom of the Participants window, then select "Mute All." Make sure the "Allow participants to unmute themselves" is NOT checked.
Lock the meeting
Next, select "More" at the bottom of the Participants window and then "Lock Meeting." This prevents anyone from being able to come back in your session after you have removed them.
Remove the participant(s) causing a disturbance
While the Participants window is open, remove the unruly participant by moving your mouse over their name and selecting"More" to thr right of their name and then "Remove" to kick them out. If you have locked the meeting via the step above, they won't be able to get back in.